How To Use an Airless Paint Sprayer
Airless spraying is the fastest way to complete most painting jobs. Learning how to use an airless sprayer is quite easy, but like anything new, practice and a little knowledge will help you achieve professional-quality results in no time.
Whether you are a first-timer or an experienced painter, take a minute to review the information here and on the operation video and Quick Operating Guide that came with your sprayer.
Follow Important Safety Precautions
Whenever operating any equipment, take proper safety precautions. Be mindful of potential hazards, wear protective clothing and eye-wear and stay alert. Always refer to the specific manual and safety procedures for the spray equipment you are using. You can find manuals and other helpful information on the Support Page.
Proper Sprayer Set-up
While the specific steps for preparing your sprayer for use will be different depending on the model of sprayer you own and whether or not you have used your sprayer before, the basic steps include:
- Connecting the spray gun and hose
- Flushing and priming the sprayer
- Installing the tip and guard
For detailed instructions refer to your sprayer's instruction manual. You can find manuals and other helpful information on the Support page.
Proper Surface Prep
Preparing the surface you’ll be spraying is the most important part of any painting project. Use TSP (Trisodium Phosphate) to wash any interior walls and allow to dry. For exteriors, use a pressure washer and a cleaning solution to thoroughly clean the surfaces and allow to dry. Once clean and dry, repair any cracks, chips, and holes and sand any rough areas.
With any airless project, expect a certain amount of overspray. To protect surfaces from overspray, spend a few minutes preparing the surroundings. Cover all baseboards and protect any furniture, shutters, or windows. When painting outdoors, take careful note of wind directions, and cover any plants or shrubs with plastic to protect them from overspray.
Proper Spray Technique
For even paint distribution and quality results, follow these basic spray techniques:
- Keep spray gun about 12 inches from the surface
- For best coverage, use a long, continuous motion – start your motion before triggering gun and continue your motion after the gun trigger is released
- Overlap your spray pattern by about 50% – simply aim the tip of the spray gun on your next pass at the edge of the previous painted area
For more detailed information, visit the Spray Techniques page.
Graco Sprayers & Accessories
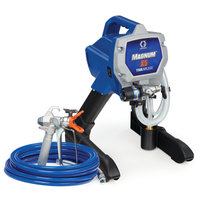
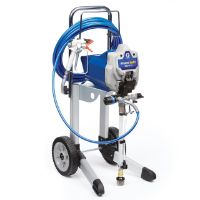
Now that you know how to spray like a pro, find a Graco, Magnum or TrueCoat model that meets your needs by using our Product Selector tool or compare the models side-by-side using our Comparison Chart.
Using the right spray tip can make your project easier. Use our Tip Selector tool to ensure your spray tip matches the job. Find out more information about the Graco spray by visiting the RAC IV Spray Tips page.
Graco offers a full line of accessories to compliment the sprayers. Whether it is a Pressure Roller Kit or Tip Extension to get the job done faster or Pump Armor to keep your sprayer operating at top form, Graco has the accessories you need. Visit the Accessories page to see the full list or visit your sprayer's product page to see the accessories specific to that sprayer.
Related Projects
Shutters
With a fresh coat of stain or paint, decorative shutters greatly improve your home's curb appeal while preserving and protecting them from sun and weather damage.
Sheds
Sheds are great for storage. Just like your house, your shed can fade over time. Graco sprayers make it easy to freshen its appearance with a new coat of paint or stain.
Railings
Railings take a lot of abuse. Keep them looking their best with a fresh coat of paint or stain to preserve and protect them from the sun and weather.


