How to Paint a Garage Door Using a Paint Sprayer
Project Overview
Painting a garage door is an easy one-day project. With all the angled panels of modern garage doors, spraying is quicker and easier than brushing or rolling. It’s really the best way to get a professional, smooth, even finish.
Safety Notice: Whenever operating spray equipment, take proper safety precautions, stay alert and be mindful of potential hazards. Wear protective gear such as gloves, safety glasses/goggles, spray sock (hood), hat, proper footwear, dust masks and respirators. Make sure there is adequate ventilation. If you’re painting in the vicinity of appliances, turn them off. (See Safety Precautions in your Sprayer Operation Manual.) Always refer to the specific instructions and safety procedures for the spray equipment you are using.

WATCH: How to Paint Your Garage Door with an Airless Sprayer (3:25)
WATCH: How to Paint Your Garage Door with a Hand-held Airless Sprayer (3:12)
Suggested Tools & Equipment
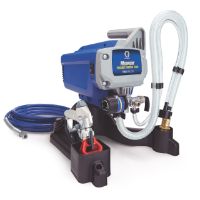
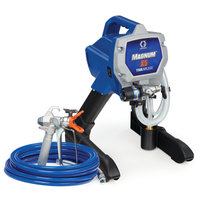
- Graco, Magnum, or TrueCoat Paint Sprayer (visit Paint Sprayer category page to compare models)
- Paint/Stain
- Spray tips – a wider spray pattern for large surfaces and narrow size for smaller surfaces (see tip selector)
- Buckets for priming sprayer and clean up (two needed)
- Stirring sticks
- Paint strainer bag – helps prevent tip plugs and provides a better finish
- Tarps, drop cloths, or plastic sheeting
- Masking tape
- Paint brush for touch-ups
- Tip Extensions (optional, see product details – for hard-to-reach areas that would otherwise require a ladder or would be difficult to spray (i.e. behind bushes)
- Pressure Roller attachment (optional, see product details)
- Additional airless hose sections if needed (see product details)
- Spray shield
- Pump Armor storage fluid (see pump protectant product details)
- Cleaning rags
- Stiff nylon brushes for clean up
Getting Started/Prep
- Painting a garage door with an airless sprayer
- Move all outdoor furniture or any other items such as a grill away from the area to be sprayed. Allow plenty of space for your tools and equipment. Tape off any trim, and cover any surfaces you don’t want sprayed such as windows or shrubs with plastic.
- Use a pressure washer and cleaning solution to wash the entire area that is to be painted. Allow significant time for the surface to dry.
- Remove any dirt, mildew, or mould and scrape off any peeling paint.
- Repair any damaged areas, sand any rough surfaces and caulk gaps as needed.
Pro Tips
It’s best to plan your project on a day that’s not windy. The wind could affect your spray pattern. If there’s only a slight wind, spray with the direction it’s blowing.
If you’re covering up an uneven finish, possibly where you’ve done a lot of scraping, spray a coat of primer before painting. This will allow the top coat to adhere stronger to the surface.
Spraying
- Select the spray tip that’s best suited for the paint you are using and the surface to be sprayed. Be sure the tip’s hole size does not exceed the maximum capacity of your sprayer (see spray tip info).
- Pour your paint through a strainer, to get rid of any dried sediment. If you’re using paint from multiple containers, mix it together in an empty 20 litre container to ensure consistent colour even if small colour differences exist between individual paint cans.
- If you don’t have a lot of spraying experience, practice spraying on a piece of cardboard. This is where you can fine-tune your technique and adjust the sprayer for the best spray pattern:
- Hold the spray tip approximately 30 cm from the surface.
- Pull the gun trigger after starting each stroke, then release the trigger before the end of each stroke.
- The gun must be moving when the trigger is pulled and released. This will create a fuzzy edge around the entire spray pattern to help create an even finish.
- Aim at the middle of each previous pass so you’ll overlap it by 50%.
- Flex your wrist so the front of the sprayer remains perpendicular to the surface. Fanning the sprayer one-way or the other will result in uneven spray patterns.
- Spraying horizontally, work in sections only as far as you can comfortably reach.
- To achieve the best spray pattern, always start at the lowest pressure and increase, until you achieve the desired results.
- Frame in the door. At the edges of the house, use a spray shield to help control overspray. Spray all the way around and windows, then start at the top and work your way down.
Clean Up
- Allow significant time for the paint to dry before removing tape from your trim. This will result in crisp, clean lines.
- Remove all coverings from shrubs, bushes and plants. Carefully remove all tape and plastic covering from window and door trim.
- Replace any hardware, such as lighting fixtures, that you removed.
- Clean your airless paint sprayer after each use. Follow the directions in your user’s manual for Power Flush cleaning with water based materials or use the bucket method of cleaning if applicable. For more information, see Power Flush Video or refer to your Sprayer Operation Manual.
- Return any other items (furniture, etc.) to their proper place.
Related Projects
Shutters
With a fresh coat of stain or paint, decorative shutters greatly improve your home's curb appeal while preserving and protecting them from sun and weather damage.
Sheds
Sheds are great for storage. Just like your house, your shed can fade over time. Graco sprayers make it easy to freshen its appearance with a new coat of paint or stain.
Railings
Railings take a lot of abuse. Keep them looking their best with a fresh coat of paint or stain to preserve and protect them from the sun and weather.


